Intro: How To Mount A Transducer On A Kayak

So, you’ve set your sights on catching the big ones, huh? Well, let me tell ya, a fish finder with its trusty sidekick, the transducer, can steer you right to the fishing hotspots. How’s it you ask? Simple. The transducer sends sound waves into the water, bounces ‘em off the objects below, then sends the data back to the fishfinder to give a visual representation. Pretty nifty, right? But the trick lies in mounting it right.
The first thing you gotta do is pick a spot. Ideally, you want your transducer to be submerged in water at all times, so it can do its job accurately. I personally prefer the back of the kayak, near where I sit. However, keep in mind, this spot varries depending on the design – some kayaks may have a transducer scupper, others might not.
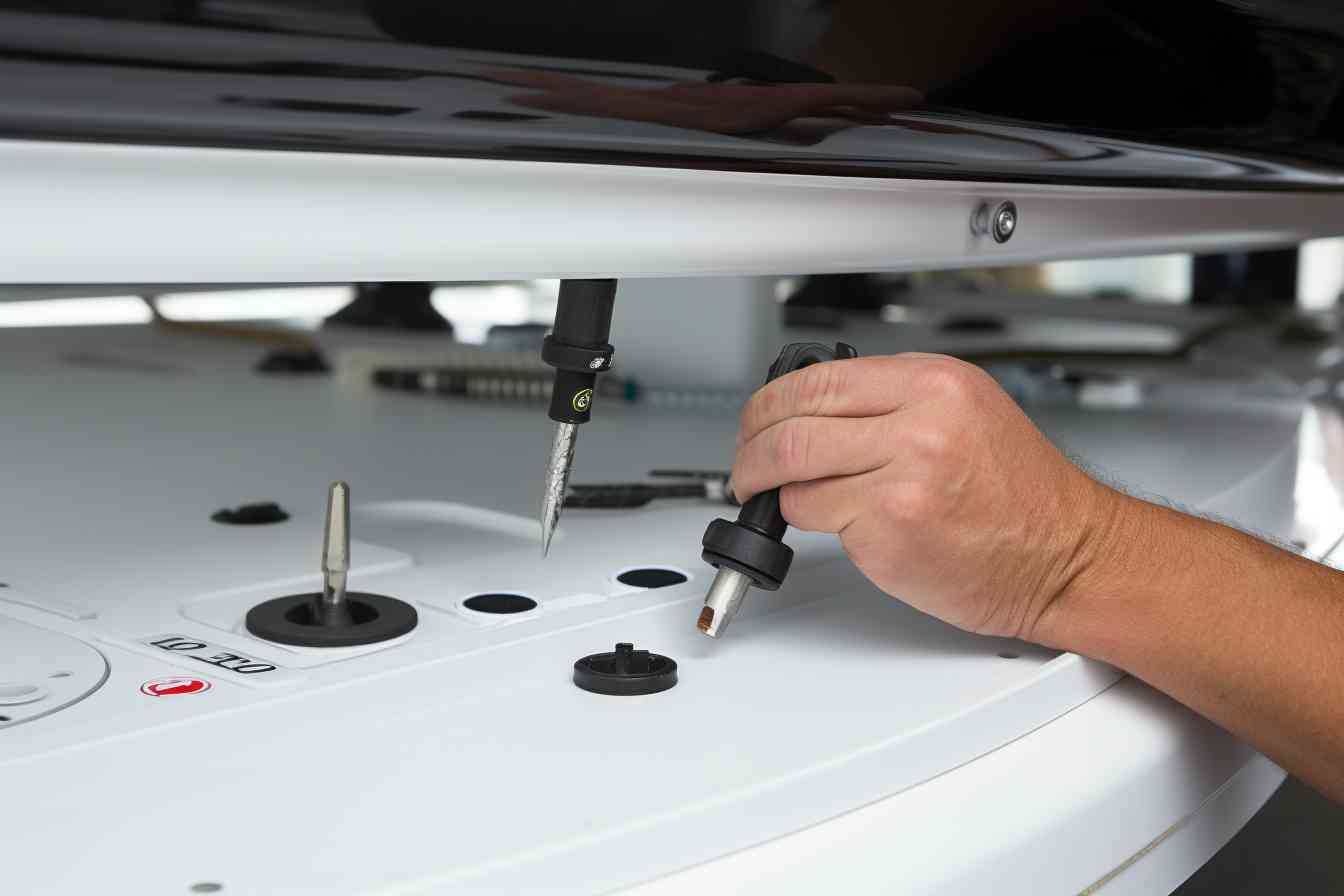
Now comes the actual mounting part. Start by cleaning the area where you plan to mount the transducer, removing any dirt or debris. Apply a healthy glob of marine goop (nope, that’s not a typing error, it’s a real thing). Press the transducer into the goop, but don’t squish it flat, you want some of it to squeeze out the sides. Wait a couple of minutes for the goop to start setting.
Lastly, use zip ties or bungee cords (whatever floats your boat!) to secure the transducer to your mounting block or the kayak hull, until the goop fully dries. If you want to go the extra mile you can use a drill to put in screws.
But remember, mate, patience is the key. It’s not a race. Once the transducer is on, you’re one step closer to having a successful fishing trip. Good luck!
Will Transducer Work Through Kayak?

So, you’re pondering if a transducer will work through a kayak, right? Well, the one-word answer to this query is – absolutely! But let me explain a bit more.
When it comes to transducer installation in a canoe-like watercraft such as a kayak, it’s absolutely possible for your transducer to function through the hull. In fact, this method is called a ‘thru-hull’ installation, and it’s one of the most common ways of mounting transducers on boats and kayaks nowadays.
The science behind this magic is quite fascinating. Transducers utilize sound waves—called sonar—to create a picture of what’s beneath the water. These sound waves can pass through a solid object, like your kayak’s hull, and get reflected back to the transducer. How neat is that!
Bear in mind, though, the material of your kayak is a huge factor here. For a ‘thru-hull’ mount to work, your kayak needs to have a solid, single-layered plastic hull. You’d have some trouble mucking about with double-layered or foam-filled hulls.
Also, be aware of another crucial piece of information – attaching the transducer inside the hull of your kayak will decrease the sonar’s sensitivity slightly. However, this decrement is barely noticeable and shouldn’t affect your fishing hotspots discovery. Stick with me, and I’ll guide you through the whole procedure of mounting a transducer on a kayak, step by step, in the following sections.
Where Do You Mount A Fish Finder On A Kayak?

Well, having a fish finder on your kayak can elevate your fishing game like nothing else! Now, if you’re scratching your head wondering where to mount this handy device on your kayak, relax—I’ve got you covered. When it comes to positioning, it’s generally preferable to install the fish finder where you can easily glance at it. This spot is often close to the seating area, but not so close that it interferes with paddling.
Thinking about paddle strokes, you don’t want any disturbances, right? That’s why handle clearance should be your priority. A mount that clamps onto the side of your kayak, just behind the cockpit, can be a good option for this. This location often allows for a clear look at the display without requiring you to twist around.
Next up is the comfort factor. Suppose you’re in the middle of nowhere, surrounded by water, breezing through in your kayak. You wouldn’t want your fish finder to be a nuisance, right? Hence, try it out before you make it permanent! Sit in your kayak, pretend to paddle, and reach for the fish finder. Comfortable? Perfect! If not, adjust until it feels just right.
Each kayak and angler are different, so there’s no one-size-fits-all answer. But remember, a fish finder can only help you if it’s in a convenient, easy-to-read location. Mount it right, and you’ll ramp up your fishing game in no time at all—just you wait and see.
How To Mount A Transducer On A Kayak Youtube
Well, nothing beats going hands-on when it comes to learning new things, right? And that’s why YouTube is such an amazing resource. So, let’s deep-dive into how to mount a transducer on a kayak, just as explained on YouTube.
- The first thing you need is to select your transducer’s location. Ensure it’s safely housed away from areas of high impact.
- Secondly, gather all your needed tools. This may include screws, a drill, silicone sealant, and of course, your transducer.
- A lot of folks on YouTube suggest creating a template of your transducer as it can really help simplify the mounting process. All you have to do is trace the base of the transducer onto a piece of cardboard and then cut it out.
- Now, place the template onto your chosen spot on the kayak and mark the spots where you will place the screws.
- Next, drill some pilot holes. Be cautious here! You debfinitely want to ensure you are only drilling through the kayak’s hull and not any other part.
- Once that’s out of the way, apply a decent amount of silicone sealant to the holes and also the base of the transducer. This is to make sure the transducer is sealed in place and prevents any potential leaks.
- Screw your transducer into the pre-drilled holes. Make sure it’s firm but don’t overtighten it or you might, you know, strip the threads.
- Wait for the silicone sealant to dry – patience is key here.
- After the sealant has dried, you can then proceed to connect the transducer’s cable to your fish finder. You are now all set for some serious high seas adventuring!
Remember folks, YouTube is a treasure-trove of knowledge just waiting to be explored. There are countless video guides and tutorials that can provide step-by-step methods of mounting a transducer on a kayak. So if in doubt. Check it out. Stay adventurous!
What Is The Correct Way To Mount A Transducer?

Well, hello there and welcome back to our informative kayak guide. It’s about time we tackled an essential question – This, my dear friend, if you’re not familiar, is that little device that sends and receives sound waves under water, a crucial companion if you’re sporting a fish finder on your kayak. Now, there’re different ways to go about this and it largely hinges on the type of transducer you’ve got, and the type of kayak, of course.
Let’s dive in, shall we? First off, it’s not uncommon to mount a transducer inside the kayak hull. An in-hull mount is pretty straightforward and involves sticking the device in a bed of marine goop (silicone). A find spot in the hull, away from any ribbed areas or obstructions, where it won’t interfere with your paddling. Clean the chosen area thoroughly, apply a generous amount of goop, plant your transducer in it and leave it to set. This ensures the device is not exposed, reducing risk of damage.
Doing an outside mounting job? Here’s how! You can attach the transducer onto the back of the kayak, oftentimes on the rudder bracket. Ensure the spot you’ve selected will keep the device submerged, even in choppy water. To mount, drill holes matching the transducer bracket on the selected spot. Fasten the bracket using bolts, ensuring it’s tight and secure. And voilà, your transducer is mounted.
Of course, remember to always run your transducer cable carefully and securely to prevent any damage. And there you have it folks, correct ways to mount a transducer. Happy paddling!
What Is A Kayak Transducer
A kayak transducer is quite a nifty little contraption. It’s the part of a fish finder system that sends out and receives signals, helping you map out the underwater world beneath your kayak.
-
A transducer works as the key component in a fish finder system: It emits sonar waves that bounce back upon hitting any object like a smack of fish beneath the water surface. When these signals return, the transducer interprets them and sends that information to the fish finder’s screen. This information is then displayed as images, allowing kayakers to visualize the world underneath their vessels.
-
One key aspect to remember is that transducers come in different types. The type of transducer you choose may depend on several factors, including your fishing style, the water environment, and the design of your kayak. Varieties include through-hull, in-hull, transom mount, and portable transducers, each with unique pros and cons.
-
Some transducers are designed to be mounted outside the kayak, while others can be installed inside. External transducers provide more accurate readings as they’re in direct contact with the water, but they can get damaged if the kayak brushes against rocks or the dock. Alternatively, internal ones are safer but can give slightly less accurate readings as they read through the hull’s material.
-
For a transducer to work effectively, it should have a clear, unobstructed path to send and receive signals. This entails no air bubbles, plants, or debris between the transducer and the water.
-
Often times, transducers come with mounting kits. These kits contain necessary items like bracket, screws, bolts, and adhesive, simplifying the mounting process. That said, before you plunk down your dollars, it’s good to understand what’s included in the kit and what you might need to purchase separately.
-
Transducer mounting requires careful planning. The location where you place it on your kayak plays a critical role in its performance. Places to avoid include the area right beneath the paddler’s seat and areas close to the sides of the kayak. The paddle stroke can cause turbulence in these areas, interfering with the accuracy of readings.
-
Finally, remember that mounting a transducer on your kayak is a doable DIY project. However, if you’re unsure about anything or want to avoid the risk of causing any damage to the kayak or the transducer, it might be wise to seek professional help. You’re bound to find a kayak dealer or a fish finder specialist in your area who can take care of it.
How Do You Mount A Transducer Without Drilling Holes?
Alright, so you’re probably wondering, how in the world do I mount a transducer without drilling holes in my beloved kayak? Well, let me walk you through it.
First off, you’ll want to grab yourself a nice piece of foam. Yes, you heard me correctly – foam! You can snag some good-quality, waterproof foam at your local hardware or craft store. Then, you shape this foam to fit the contours of your kayak where you plan to mount your transducer. It’s like making a custom shoe for your transducer!
Next, you’ll attach the transducer to the foam. Use a good waterproof marine adhesive to secure that puppy. You want that transducer riveted there, not moving an inch. Let the adhesive dry thoroughly.
After that, position this foam-transducer combo inside your kayak, where you want your transducer to be. The perfect spot would probably be somewhere near the rear of the kayak, where it’s not in your way when you’re paddling. You’re thinking that’s easy enough, right?
Here’s the final piece of the puzzle. You fill in the space around your foam-transducer combo with some more waterproof material. That’s to ensure it doesn’t budge while you’re out at sea. Something like silicone would do just the trick. It’s easy to mould, stable and won’t leak water into your kayak. There you have it – a hole-free, secure setup for your transducer.
Hey, it might seem a bit convulted at first, but trust me, it really isn’t. Plus, you’d be avoiding any potential leaks or damage to your kayak. Personally, I think that’s well worth a shot, don’t you?
Can You Mount A Transducer Inside A Kayak
Sure, many kayak enthusiasts wonder exactly that – can you actually mount a transducer inside a kayak? Well, wonder no more! Here are the details:
• Can you? Absolutely! It’s not only possible, but rather simple to mount a transducer in the inside of your kayak.
• The first thing you want to do is pick out an optimal location for the mounting. It should be a flat area that’s out of your way when riding.
• After you’ve picked a spot, clean it up thoroughly. Dust and dirt can cause issues when you try to mount the transducer.
• Next up, apply some silicone or any other water-resistant adhesive on the bottom of the transducer. Make sure you cover the whole area evenly.
• Quickly before the adhesive dries, place it onto the selected spot in your kayak. Press down lightly, ensuring it sticks well.
• Now, all you need to do is wait for the adhesive to dry fully. Once it’s dry, your transducer is securely mounted and ready to go!
• Give your setup a test in a controlled environment before taking it out on open waters. You don’t want to find out there’s an issue when you’re far from shore!
Remember, the way you mount a transducer might affect its performance. Hence, be careful not to damage it or impede its function during the process. Alright, now it’s time for you to give it a try!
Final Verdict
Alright, let’s wrap this up now. So, you’ve gone through the motions, trudged through the nuts and bolts, and you’re now on the cusp of mounting your transducer on your kayak. After fitting the thing, riggin’ it up just right, and securing it in place, it’s time to blast off into crystal-clear visualization territory.
Just a second though! Don’t go patting yourself on the back quite yet. Take a moment to confirm if you’ve done everything just right. Double-checking, even triple-checking, is critical. You don’t wanna be out there in the middle of the great big blue, realizing that you’ve goofed up.
After you’ve installed the transducer, ensure that it’s perched in the water at the right angle. An incorrectly positioned transducer might give inaccurate readings, muddling up the entire purpose of having one onboard.
Remember, getting your transducer correctly mounted on your kayak isn’t just about better fishing or navigation. It’s also about safety. Once it’s properly installed, this device can help you avoid potentially dangerous underwater obstacles, ensuring a smooth and secure paddling experience.
Alright then, paddle away my friend! Pour all that passion and energy you packed into this project back into the water. You’ve earned it. Happy Kayaking!
I hope that this nifty guide has provided you with the necessary understanding and knowledge to confidently mount a transducer on your kayak. It might not be a cakewalk, but with a little patience and care, it’s totally doable. Just remember, the devil’s in the details. Good luck, and stay safe out there!
Frequently Asked Questions
Q1: What is a transducer and why do I need it on my kayak?
A transducer is a device that converts energy from one form to another. In the case of a kayak, we’re talking about a sonar transducer, a key component of any fish-finder system. It sends out sonar signals and gathers data about what’s beneath your kayak, helping you navigate waters and locate fish more effectively.
Q2: Where should I mount a transducer on my kayak?
The transducer should typically be installed inside the kayak hull for better protection and less water disturbance. It might be placed near the stern or in some cases the center. It should be in a location that is always submerged in water when the kayak is in use for the best results.
Q3: How do I prepare my kayak for transducer installation?
First, clean the designated area inside the kayak hull. Dry it up thoroughly at room temperature. This is a small but crucial step because a clean dry surface ensures that the adhesive or silicone used to mount the transducer will stick more effectively and last longer.
Q4: Do I need special tools to mount a transducer?
Typically, the necessary tools include a drill for hole making, a screwdriver for fastening screws, and maybe a silicone gun if that’s what you’re using to mount the transducer. Most of these are standard home tools.
Q5: How do I ensure the transducer is secure?
To secure your transducer, you can use marine goop, a type of silicone that is resistant to water. Apply a generous amount to the base of the transducer and press it onto your chosen spot in the kayak.
Q6: Should the transducer be flat or angled?
The transducer should be mounted as level as possible. Any tilt or angle could result in skewed sonar readings.
Q7: What if my transducer isn’t working correctly after I mount it?
If you’re having problems getting accurate readings, it might be due to your transducer’s mounting position. Consider moving it to another location or checking it for damage. Remember, it needs constant contact with water to function accurately.
Q8: Can I mount a transducer outside the hull?
Yes, you certainly can, there are various ways to mount a transducer outside the hull, like using a transducer arm mount or a suction cup mount. However, remember that an external mount exposes the device to potential damage.
Q9: Can I remove or adjust the transducer after mounting?
Yes, but if you’ve used a permanent adhesive, it might be a bit of a hassle. Some prefer to use duct seal, as it is non-permanent and can be easily adjusted or removed.
Q10: Can I use the same transducer-mounting method for all types of kayaks?
Mostly yes. However, different kayak materials may require different adhesives or techniques – for instance, an inflatable kayak might need a specific external mount. Always make sure to research or ask for advice based on your specific kayak type.

