Intro: How To Build A Kayak Rack For An Rv

Alright, let’s delve right into the subject at hand – the construction of a kayak rack for your RV. Now, I reckon many of our readers are outdoor enthusiasts and understand the joy and adventure of kayaking. But as we all know, getting the kayak along on your road trip can be a bit of a challenge. Most RVs just aren’t designed with kayak storage in mind. So, what do you do? You build a rack, that’s what!
First things first, you’re going to need some materials. Mainly, you will need PVC pipes, pipe connectors, screws, brackets, and a measuring tape. PVC pipe is typically used because it’s lightweight, durable, and affordable, while connectors will be responsible for keeping everything together. I can’t stress enough the importance of measurements. Make sure everything fits accurately. You don’t want any nasty surprises halfway through the process. Trust me on this one.
Next up, layout time! Visualise your rack structure. A popular structure is the standard ‘A’ frame, but feel free to experiment. Well, maybe not too wild, we’re building a kayak rack, not a piece of modern art!
Onto the construction phase. Place your PVC pipes according to the laid out visual and use connecters to keep them in place. Aim for a sturdy, well-balanced rack. You might want to test it with a kayak, just to make sure.
Now attach the rack to your RV. The bracket-screw combination will come in handy here. Remember, no matter how well you’ve built the rack, if it’s not secured properly to your RV, it ain’t gonna hold.
And voila, you’ve got yourself a fully functional kayak rack for your RV! So, the next time you head out for an adventure, your kayak won’t need to miss out on the fun. Ready for the great outdoors, are we?
Sure, building a kayak rack for your RV might seem like a bit of a task but honestly, it’s a weekend project at best. And trust me, the convenience and peace of mind it brings is well worth the effort. Now, if you’ll excuse me, I’ve got some kayaking to attend to. Happy building, friends!
How Do You Make A Simple Kayak Rack?
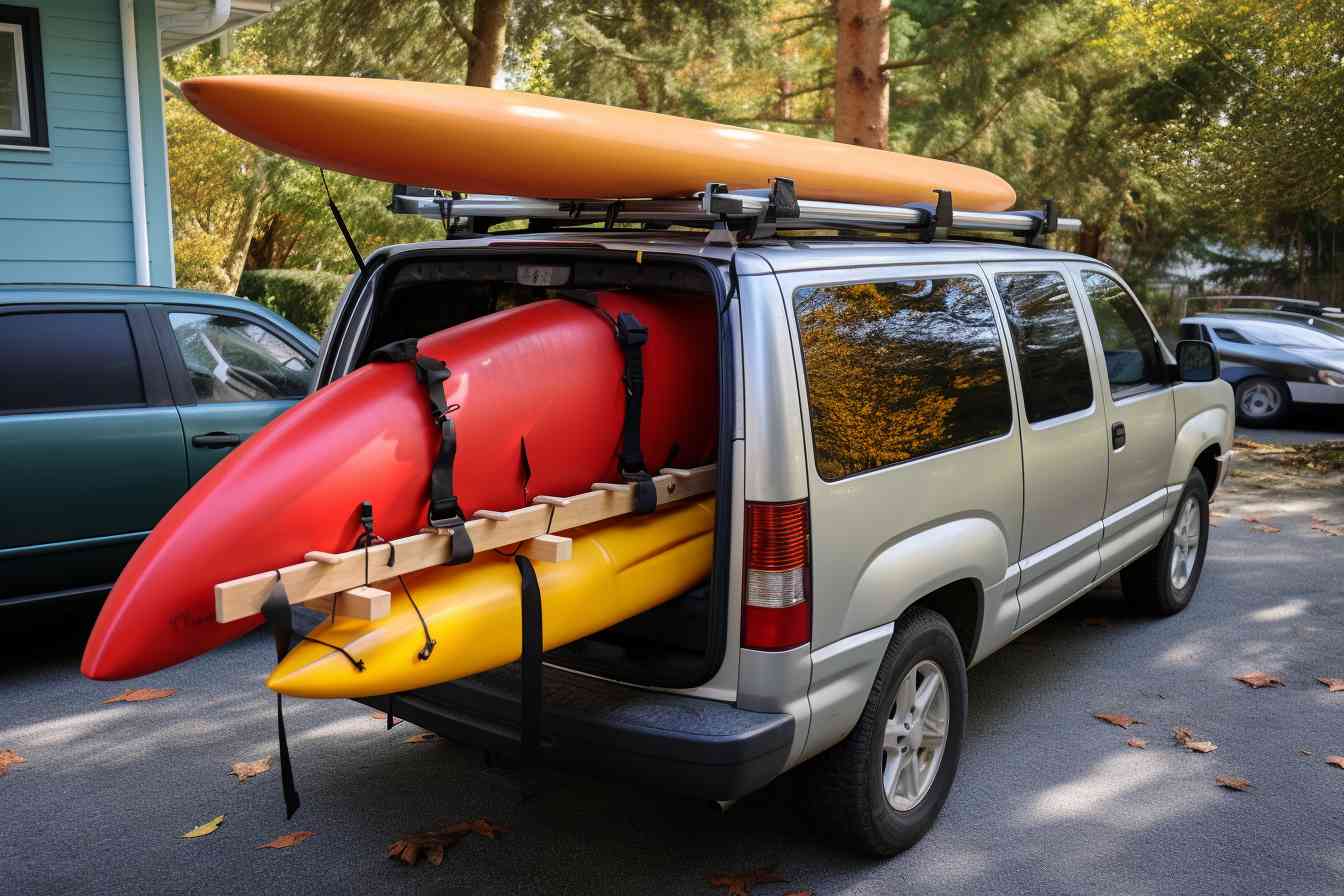
Alright, let’s get down to it! Building a kayak rack for your RV is not a piece of cake, but it’s not rocket science either. Listen up; you’ll need some basic materials: a couple of C-clamps, pipes with the same length as your kayak, and strong cords to tighten the pipes together.
Start by adjusting the C-clamps on the roof of the RV. Spread them out to provide balance, but make sure they’re at a reasonable distance so that your kayak won’t wobble. Now, grab those pipes. The size of your pipes will depend on the size of the kayak, but remember, they should be slightly longer. Place one pipe on each side of the RV roof, across the C-clamps.
Once you’ve got that covered, use cords to fasten the pipes to the clamps. Take care to tighten the cords securely. We don’t want any kayak-related mishaps, do we? This creates a sturdy base for your kayak.
There you have it – a simple kayak rack without breaking the bank! Of course, this is a basic design, but you can adapt and change it to suit your individual needs. With this foundation, you can get creative and build a rack that is perfectly tailored for your kayak and RV.
Remember, the devil is in the details. Be sure to take every safety precaution when setting this up. It’s quite the project, isn’t it? I must admit, there’s something deeply satisfying about creating something with your own two hands. Until next time, happy building!
How Do You Attach A Kayak To An Rv?
Alright, let’s dive into the intricacies of attaching a kayak to an RV! So you are ready for your adventure, aren’t you? Kayaking is such a thrill, isn’t it? But as much fun as it is, getting your kayak to your destination can be a bit of a sticky wicket. Problem? Not at all! Let me walk you through the process.
First things first, we’ll need a kayak rack. Can’t just strap them onto the RV haphazardly, can we? The right rack will also help protect your kayaks from damage during transport. It’s best to opt for a robust rack that can support the weight of your kayaks. You get me, right?
Next, you’ll need sturdy and durable tie-down straps. These are essential for securing the kayak to the rack. Do this strategically so that the kayak is neither too tight (that might damage it), nor too loose (we don’t want it falling off on the highway, do we?). A balance is key here.
And, don’t forget about bow and stern tie-downs as well. These might seem like overkill, but trust me, proper anchoring can make a world of difference in ensuring your kayak stays where it should during the ride.
So there you have it – your step by step guide to properly attaching a kayak to your RV. Just remember, safety first! Ensuring your kayak is properly secured isn’t just good for your equipment but it’s a must for the safety of others on the road as well. Alright then, happy kayaking!
How To Build A Kayak Rack For An Rv Out
of wood, Selecting the right materials to build a kayak rack for an RV, Key considerations when building a RV kayak rack, Maintaining your homemade RV kayak rack.
Persona: Kayak enthusiast, avid RVer, passion for hands-on projects, detail-oriented.
Alright, let’s dive right into the first component: How to build a kayak rack for an RV out of wood. Now, wood, my friend, is a classic and reliable material. It’s not only durable but also easily customizable to fit any RV.
- Begin with a design: Start by sketching out your design for the kayak rack. This will guide your work and ensure you construct what’s in your mind accurately.
- Cut the wood: Armed with your design, measure and cut your wood into the specified sizes. Accuracy here is crucial, so take your time.
- Assemble the rack: Use your woodworking tools to put together the cut-out pieces according to your design. It’s a bit like piecing together a puzzle!
- Test the fit: Now it’s time for a dry run. Try fitting your kayak into the rack to ensure it fits well and secure. If adjustments are necessary, go ahead and make them.
- Seal and paint: Once you’re satisfied with the structure, apply a sealant to protect the wood from elements and consider painting it for aesthetic appea.
Now, we can move to the next part: Selecting the right materials to build a kayak rack for an RV. Just like cooking, the finished product relies heavily on the quality of ingredients you use—so choose wisely.
- Choose durable wood: The type of wood plays a key role in the durability of your rack. Go for hardwoods such as oak or maple to ensure longevity.
- Select quality hardware: Bolts, nuts, screws, and washers are crucial for holding your rack together. These need to be rust-proof and sturdy.
- Protective layers: A sealant is critical for preserving the wood from damaging elements like water and sun. Additionally, consider a paint that also offers UV protection.
- Padding and straps: To protect both your kayak and your RV you’ll need non-abrasive padding and strong securing straps.
Understanding the Key considerations when building a RV kayak rack is also essential. Here they are:
- Weight: Ensure your rack isn’t too heavy for your RV to handle. It needs to be strong, without being a burden.
- RV compatibility: Not all designs will work with all RVs. Keep in mind the model of your RV when designing your rack.
- Kayak specifications: The rack needs to fit your kayak(s) perfectly, so consider the size and shape when designing.
- Ease of Access: As much as possible, the rack should be designed in such a way that getting kayaks on and off isn’t a chore.
Lastly, let’s talk about Maintaining your homemade RV kayak rack. Like any piece of equipment, it needs upkeep:
- Regular check-ups: Inspect your rack often for any signs of wear and tear. Early detection can prevent big problems!
- Re-seal and paint: Exposure to the elements might require you to reapply the sealant and paint periodically.
- Tighten hardware: Over time, the hardware might loosen up. Regular tightening helps.
- Clean often: Cleaning the rack from time to time can prevent material decay and keep it in good shape.
That’s all, folks! Building a kayak rack for an RV can be quite an adventure, but with the right tools, materials, and a bit of patience, you’ll be all set. Happy building!
How Do You Tie A Kayak To A Roof Rack?
Well, friend, the first thing that comes to mind when you ask “how do you tie a kayak to a roof rack?” is the word ‘securely’! Now, let’s break this down step-by-step. The first thing you’ll need is of course, a roof rack on your RV. If you don’t have one already, not to worry – they’re pretty simple to install.
Now, to tie your kayak you’ll need a few things – namely some sturdy straps and perhaps a little know-how on knot tying. Now, these aren’t your everyday run-of-the-mill straps, mind you. You’re gonna want to look for something called cam buckle straps. These bad boys are specially designed to hold heavy loads – like kayaks – securely in place without causing damage.
Once you’ve got your straps and kayak ready, place the kayak upside down on the roof rack. This helps to reduce wind resistance when you’re cruisin’ down the highway.
Next, loop one strap over the front of the kayak, just behind the cockpit. Feed the other end of the strap under the roof rack bar on one side, then repeat on the other side. Once you’ve got both ends of strap in hand, buckle ‘em up and pull tight.
Repeat this process for the rear of the kayak, using another strap. Ideally, the straps should form a sort of ‘X’ shape over the kayak. This ensures an even distribution of force and will keep your kayak safely secured.
Remember, safety first! Always check and double-check your straps to ensure everything is secure. There’s nothin’ worse than seeing your kayak making a break for it in the rear-view mirror! Happy kayaking, folks – and safe travels!
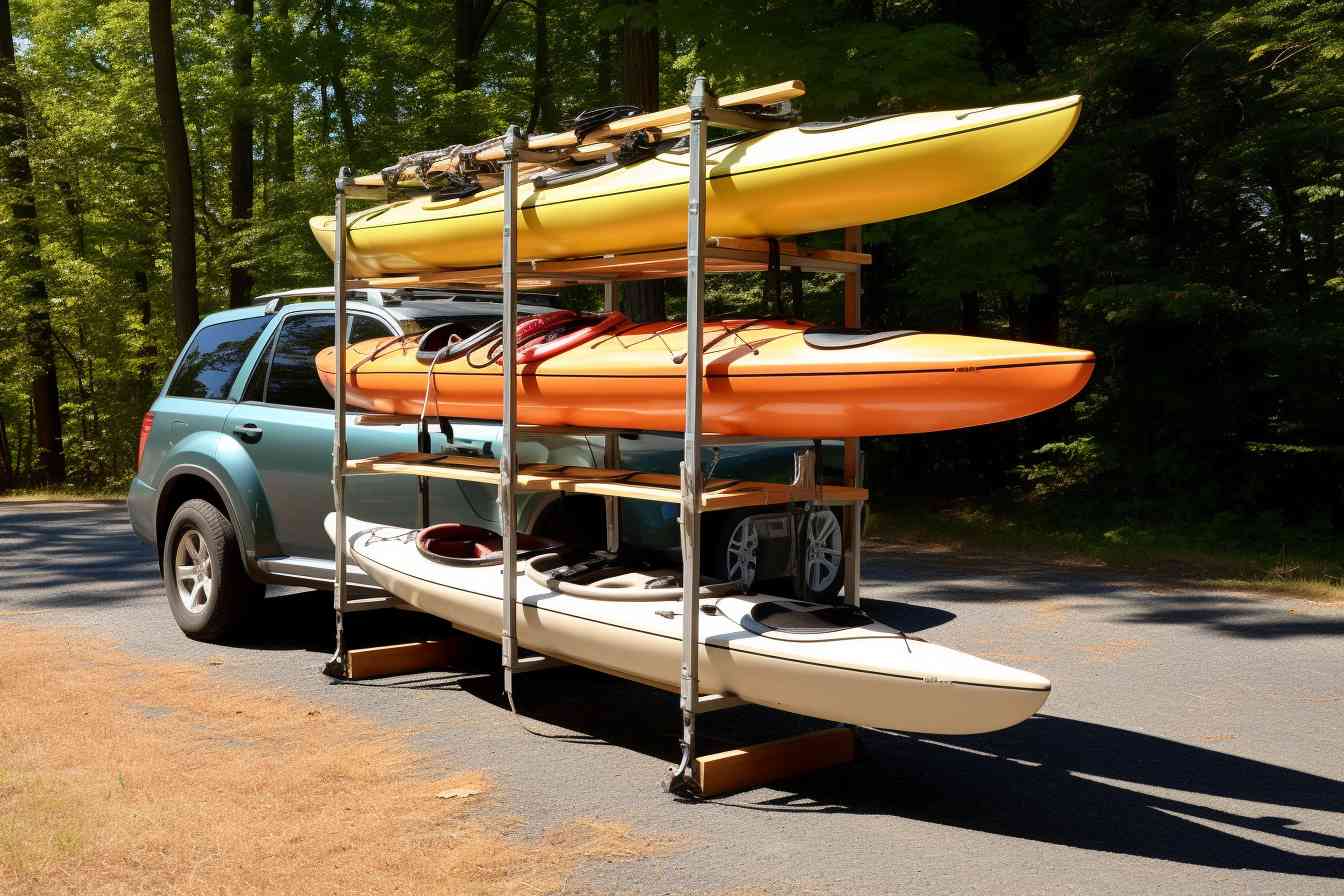
How To Build A Kayak Rack For An Rv Diy Vertical Kayak Carrier
As your handy kayaking guide, let’s jump right into the nuts and bolts of creating a kayak rack for an RV. I’m betting you’ll love the sense of accomplishment once your DIY project is complete. So, let’s go!
- First things first – Set Up! The space you’re working in matters. Go on and ensure that your RV is parked in a spacious area. Then, gather the necessary tools such as clamps, power drill, circular saw, measuring tape, and screws. Trust me, the right tools make all the difference.
- Measuring Up! Measure your kayak’s width and length – it’s essential to ensuring a snug fit in your newly built rack. Take note of the measurements as we will need them soon.
- Picking the Material! Pick your materials wisely. I highly suggest using pressure-treated lumber, it’s excellent for handling the elements. Remember, the measurement I asked you to take down? Use it to cut the lumber. That’ll be the base of your rack.
- Rack Frames! Assemble your rack frames. Not as intense as it sounds, believe me. Use two vertical pieces and two horizontal pieces for each side of the frame and screw them together with your power drill. Make sure these are sufficiently strong to bear the weight of the kayak.
- Mounting Time! Attach the frames onto the RV’s ladder – it’s a sturdy spot and allows us to make the most of the vertical space. Hold the frames against the ladder and secure it with heavy-duty straps. Make sure it’s nice and tight.
- Safety Check! Now, perform a safety check. Make sure everything is secure. Remember, safety first.
- Kayak Placement! Finally, place your kayak on the mounted rack. Adjust if necessary and secure the kayak with straps for a secure fit.
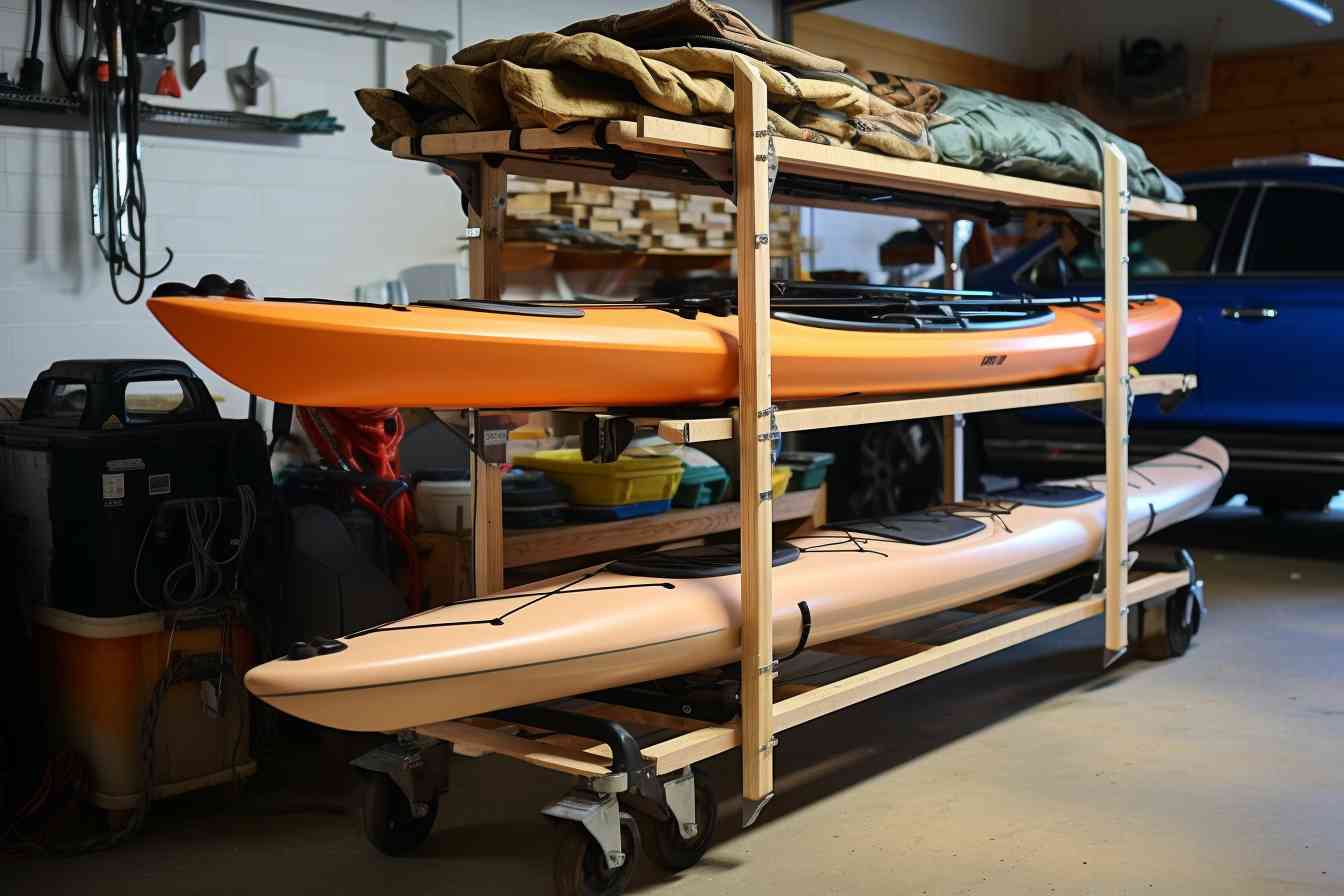
Now, moving onto the DIY vertical kayak carrier:
- Gather the Materials! Apart from the tools used in the previous process, you would also need two pieces of 2×4 treated lumber, one long piece of 2×6 lumber, and a pair of kayak J-racks.
- Prepping the Lumber! Cut your 2×4 lumber to match the length of your kayak and attach this to your 2×6 piece. This would create a T-shape.
- Add the J-Racks! You’ll need to attach the J-racks onto the horizontal part of the T-shape. Make sure it’s balanced and can hold the kayak weight evenly.
- Time to Mount! Now, mount your DIY vertical carrier onto the RV. It can be on the ladder or to the side of the RV as long as it is secure.
- Safety first, Kayak Second! Again, perform a safety check. You don’t want your kayak flying off in the middle of the highway. Then, place your kayak into the J-racks and secure with straps.
- Optional Step! You could use foam pads or pool noodles as buffers to avoid any damage from friction between the kayak and lumber. Though not required, it does give you that extra peace of mind.
So there you go folks, your guide to engineering your very own kayak rack and carrier. It’s a bit of work, but remember, your kayak is relying on you for a safe ride. Now the open road awaits, so grab your paddles and let’s see where the tide takes us next!
What Kind Of Rack Do I Need For A Kayak?
Well, let’s get started with the type of rack needed for a kayak. Now, there’s no one-size-fits-all here; the type of rack you’ll need largely depends on several factors specific to you. First, how often do you plan on using your kayaks? If you take them out frequently, you’ll want a rack that you can easily load and unload them from. The less hassle, the better, right?
Then, there’s also the size of your kayaks to consider. A larger, heavier kayak will require a more sturdy rack than a smaller, lightweight one. Additionally, if you have multiple kayaks, you’ll need a rack that can adequately hold all of them securely – we don’t want any accidents happening while you’re hitting the open road!
Also, think about your RV’s size and capacity. A bigger rack will add considerable height to your vehicle, possibly making it difficult for you to traverse certain roads or park in specific areas. Not to mention, an oversized rack could lead to decreased gas mileage – something no one wants! So be mindful of these aspects while choosing your kayak rack.
Let’s not forget one crucial factor: your budget. Kayak racks can range quite a bit in price, from relatively low-cost options to more high-end models. While it might be tempting to go for a cheaper rack, consider the quality and durability you would be sacrificing. It’s always better to invest a little more upfront if it means a safer, more reliable rack in the long run.
So, in a nutshell, finding the right kayak rack for your RV is a balancing act of convenience, size, durability, and cost. Take the time to research different options, evaluate their pros and cons, and make the decision that fits both your needs and your budget. There’s no rush – after all, a good kayak adventure is worth the wait, isn’t it?
Final Verdict
I’ve always been a hands-on kind of guy – and I’m not afraid to admit, I love my RV and my kayak just as much. So when it came time to create a kayak rack, I dove headfirst into the project. Here are my thoughts on what you’ll need for this do-it-yourself task.
The first thing you’ll need, of course, is the raw materials – I’d recommend steel or aluminum for their strength and resilience. Next up, you’ll need some heavy-duty straps. These’ll ensure your kayak is securely held in place during transit – God forbid we’d want any mishaps on the open road! I found that adjustable straps were the best, they allow some flexibility based on the size of your kayak.
Ah, proper measurements – not my strong suit, but essential nonetheless! You’ll need to measure your kayak’s length and width, as well as your RV’s roof dimensions. Armed with this knowledge, you’ll then be able to calculate the size of the rack you need.
As for the actual construction of the rack, well, that’s a whole other ball game. I’d suggest starting off with a blueprint of your design – keep it simple, especially if you’re new to DIY projects. Once your design is finalized, cut out your metal pieces, then weld or bolt them together.
After all that hard work, well, there’s nothing more satisfying than seeing it all come together – your RV, your kayak, and your gleaming new rack. It’s quite a sight, I tell ya! But remember, the project doesn’t end here. Regularly check and maintain your rack to ensure it’s in tip-top shape.
And finally, a word from the wise – take care when loading and unloading your kayak. I’ve had my fair share of bumps and bruises in my time, and I can tell you, they’re not fun. So take it easy, be careful, and most importantly, enjoy the fruits of your labor. Happy kayaking!
Frequently Asked Questions
Q1: What’s the main idea behind building a kayak rack for an RV?
The heart of the matter here is creating a sturdy, reliable storage solution to carry kayaks on your adventures with your RV. It’s about embracing the DIY spirit, adding a personal touch, and of course, saving some cash by not buying a pre-made one.
Q2: What materials do I need to construct a kayak rack for an RV?
Hang on to your hard hat! You’ll need PVC pipes, a saw, elbow connectors, and T-joints – these are the basic building blocks. Don’t forget the glue! PVC cement will hold it all together. Some folks like to include foam padding for extra kayak protection.
Q3: How do I make sure the kayak rack is sturdy enough?
Totally get you, safety first, right? Check your joints regularly, those are the weakest points. And, when assembling, make sure everything fits snugly. Remember, very tight is just right.
Q4: What type of kayaks can fit on a self-made RV rack?
Great question, my friend! This really hangs on the dimensions of your rack. By tweaking the design, it should fit most types of kayaks. Just remember, the size and weight of the kayak should be within what your RV and rack can safely hold.
Q5: Can I add wheels to the kayak rack?
Oh, you’re really taking it to the next level! Yes, you could add wheels, but do consider where you’ll be using it. Wheels could make it harder to secure during transport, especially on uneven terrain.
Q6: How can I secure the kayaks to the rack?
Ah, the cherry on top! Using ratchet straps or bungee cords should do the trick. Just be sure they are sturdy and resilient.
Q7: Are there any legal issues with having a kayak rack on an RV?
Smart thinking! It does vary by location, so double-check local laws. Generally though, if it doesn’t obstruct license plates or lights and is secure, you should be okay.
Q8: Can I build a rack that holds more than one kayak?
Why not, right? Just remember – the more kayaks, the heavier it gets. Your RV’s roof and your rack need to hold that weight. Always remember, safety is paramount.
Q9: Do I need special tools to build this rack?
Good news! You don’t need any fancy tools. A basic saw to cut your PVC pipes and maybe a drill if you plan to secure it with bolts.
Q10: How do I maintain my kayak rack?
Maintenance is essential, my friend! Regular checks, particularly of the joints and connectors, will ensure long-lasting success. Keep it clean, and replace any worn-out parts promptly. Prevention is better than cure, you know!
Related Video
