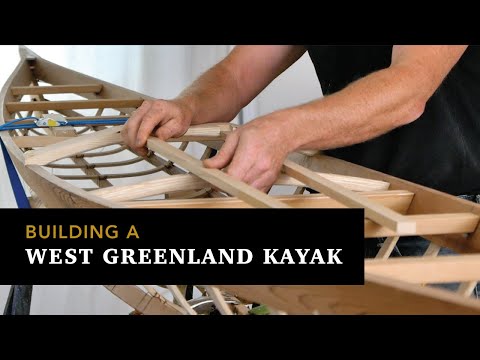
Intro: How To Build Your Own Kayak
Building your own kayak, now isn’t that an adventure? Don’t be scared, my friend. This right here, is a journey that I am thrilled to guide you on. We’re going to talk about everything you need to know, and by the end, you’ll be well on your way to having your very own hand-built kayak. Now, isn’t that something?
Now, hold on to your oars because this journey gets better. Can you imagine the feeling of gliding through the water in a kayak that you built with your own hands? The pride, the accomplishment – there’s nothing quite like it. It’s quite the adrenaline rush, if you ask me, and totally worth every splinter and every drop of sweat.
The first thing you need to know is that building a kayak is not as complicated as it seems. But before we go there, let me clear this up– this isn’t a race. Take your time, enjoy the process, soak in the experience. Alright, let’s break it down.
The materials you’ll need include several sheets of plywood for the hull, wooden strips for the deck, epoxy resin for sealing, and paint for adding a touch of personal style. But remember, it’s not about just the materials. Patience, persistence and a can-do attitude are also key components of the process.
The next step is cutting and assembling the plywood pieces to form the boat’s shape. It may seem daunting at first but remember, every expert was once a beginner. As you piece together your creation, think of it as a giant jigsaw puzzle- the thrill lies in finding the right fit.
Sealing the wood with epoxy resin follows next – a protective measure to ensure your kayak is water-resistant. And let there be color, my friend! Painting your kayak not only embodies personality but safeguards it against the sun’s UV rays too.
And voila, there you have it – your very own kayak. Now all that’s left is to embrace the open waters. So, paddle on, my friend, for an adventure awaits!
Notice how I’m telling you this in a relaxed, conversational tone? That’s because building your own kayak isn’t just about the end product. It’s also about the journey – the satisfaction of creating something with your own hands, the sense of achievement when your boat finally hits the water.
So, what are you waiting for? Destiny’s calling and it’s time to answer. Get ready, get set, build that kayak!
Can You Build Your Own Kayak?
Sure thing, you can absolutely build your own kayak! It’s not just an exciting project, but also a great way to customize your experience on the water. Now, before we dive headfirst into this, just a heads up—you’ll need some patience, a little bit of skill, and a decent amount of time. It’s certainly not an overnight job, but it’s so worth it.
With the proper set of tools and materials—like marine plywood, epoxy, fiberglass, and a solid set of plans—you’re on your way. Oh, and it helps to have a knack for following instructions to the letter. The process involves basic carpentry skills such as sawing, planing, carving, and drilling.
Some folks might be wondering about the cost aspect. Well, materials could run you anywhere from $300 to $1000, depending on the type of kayak you’re building. And let’s not forget about tools—if you’re starting from scratch, factor in that cost.
But, don’t let that dampen your spirits! Remember, building your own kayak ensures it’s tailored to your needs and desires. It offers the chance to express your creativity and hands-on skills. Plus, there’s the unmatched satisfaction of cruising on the water in a boat you’ve built yourself. Exciting, right?
So yes, you can certainly craft your own kayak. It’s challenging, yes, but try picturing the sense of accomplishment you’ll feel once you’re paddling your homemade vessel. Talk about a fantastic way to enjoy the great outdoors!
Just remember, safety is key. During the building process and on the water, always prioritize safety. After all, you’re not just building a kayak. You’re building memories. And who wouldn’t want that?
How To Build Your Own Kayak Out Of Wood
There’s something truly satisfying about building your own kayak out of wood, not to mention the joy of actually navigating the water in a vessel you’ve crafted with your own two hands. Let me walk you through the steps:
-
First and foremost – the plan: Before you jump headfirst into building, you need a detailed plan. You can find a variety of kayak plans online – both free and paid – from simple designs for beginners to more complex ones for seasoned builders.
-
Materials gatherin’: You’ll need a decent amount of wood – preferably marine grade – epoxy, fiberglass cloth, varnish, and plenty of tools like saws, clamps, and a workbench. A kayak isn’t a small project, so make sure you have the room to work.
-
Cuttin’ the wood: With your plan in hand, you’ll begin by cutting your wood pieces to fit your kayak’s design. Accuracy is key here, as any irregularity in your cuts could cause problems down the line.
-
Piecing it together: Next, you’ll join the wooden pieces using the stitch-and-glue technique. Essentially, you’ll be drilling holes along the edges of the pieces, threading wire through them to hold the pieces together, and then applying epoxy to create a strong bond.
-
It’s all smooth sailing from here: Once the epoxy has set and the structure of the kayak is firm, you’ll want to smooth out the edges. This is a labor of love, requiring plenty of sanding to get a seamless, smooth finish.
-
Layering with fiberglass: Cover your kayak with a layer of fiberglass cloth, and then apply more epoxy. This layer will add strength to your kayak and waterproof it.
-
Finishing off with varnish: The final step is applying varnish to protect the wood from UV damage. Plus, it will give your kayak a beautiful, glossy finish.
-
The waiting game: Don’t be impatient! You need to let your kayak cure properly before you take it on its maiden voyage. This can take several days, or even a week in some cases.
-
Safety checks: Before you hit the water, make sure your kayak is water-tight, secure, and safe to use. Always err on the side of caution when it comes to safety.
Remember, building your own kayak from scratch isn’t newfangled or an easy task. It demands a good deal of preparation, patience, and precision, not to mention a whole lot of elbow grease. But trust me, the satisfaction and sense of achievement you’ll feel when you paddle out on the water in your homemade kayak is truly unparalleled. So, what do you say? Ready to give it a try?
What Kind Of Wood Is Used To Make A Kayak?
First off, it’s worth mentioning that when it comes to crafting a kayak, the timber you select is no trifle matter. The choice of wood isn’t just based on aesthetics, no siree. It goes way beyond the pulchritude — the stability, durability, and weight of your kayak are pretty much dependent on the wood you select.
Now, let’s chew the fat on the types of wood used in kayak construction. Traditionally, Western Red Cedar was the wood of choice for kayak builders. Still is, in fact. It’s lightweight, durable, and rot-resistant…not to mention, it boasts a plumb stunning hue that echoes the beauty of the great outdoors. However, it’s worth noting that this wood could cost you a pretty penny.
For folks looking to keep to a budget, plywood is a solid option. It may lack the natural beauty of cedar, but hey, it does the job and won’t break the bank. What’s more, it’s straightforward to work with, so it’s a hit with beginners.
If you’re leaning more on the eco-friendly side, then reclaimed wood might just be up your alley. You’d be surprised at the quality of wood you could rescue from old barns or furniture. You’ll not only be creating a one-of-a-kind kayak but also reducing your carbon footprint in the process.
To sum things up, the type of wood you should choose depends on your budget, skill level, and personal preferences. Let me tell ‘ya, picking the right wood can take your kayak-building project from good to great. So choose wisely, my friend!
How To Build Your Own Kayak For Beginners
Oh, the thrill of coming up with your very own kayak! It’s not exactly a walk in the park, but if you’re up for a challenge, it can be immensely gratifying. So, let’s roll up our sleeves and start crafting our vessel. Here’s a simple guide on how to build your own kayak for beginners.
• First things first, you’re going to need a game plan. You know, a set of plans to show you the ropes. You can find these online or purchase them from marine supply stores.
• Next on the list, gather all the necessary materials. You’ll need a quality wood, preferably marine plywood, waterproof glue, copper wire, fibreglass tape, and epoxy resin. Don’t skimp on these; quality makes all the difference!
• Once you’ve got all your gear, you can start cutting out your plywood panels. This is where accuracy counts – you want your cuts to match your plans precisely.
• With all your pieces cut, you can start stitching them together using the copper wire. This might seem a bit daunting, but trust your plans and go step by step. You’ll be amazed at how quickly it begins to take shape!
• After that comes the part where you’ll see your kayak really start to come together. You’ll coat the seams with a mix of epoxy resin and sawdust, then overlay it with fibreglass tape. It might get messy, but it’s all part of the fun!
• Once your seams are secure, you’ll apply a few more layers of epoxy resin to the entire hull. This will make it waterproof and give it that polished look.
• Then, flip your kayak and repeat the process on the inside. This might seem repetitive, but it’s crucial for making your kayak seaworthy.
• Lastly, you can add any finishing touches you like! Paint your kayak, add a seat or foot rests, maybe even a hatch for storage.
As you can see, building your own kayak requires patience, precision, and a bit of elbow grease. But the reward is a vessel that you’ve created with your very own hands, and that’s something to be proud of! So, what are you waiting for? Let’s get crafting!
How Much Money Does It Take To Make A Kayak?
So, you’re itching to know exactly how much cash you’ll be splashing to build your own kayak, huh? Well, I’ll tell ya – it’s not as bank-breaking as you might think! With some savvy shopping and careful planning, you can create a custom kayak for less than buying a new one from the store.
First off, let’s talk materials. You’ll need some marine plywood, epoxy, and fiberglass. Prices will fluctuate based on where you live and where you source your materials, but you’re probably looking at a bill around $200 to $500 on average.
Next up, tools. If you’re already a bit of a DIY whiz, you might have some of these lying around. Expect to need a jig saw, a power drill, and a good sander. If you don’t have these, then it might involve a little extra cash. You can probably budget for another $100 to $200 here, depending on the quality of the tools you choose.
Lastly, let’s think of the little extras. Stuff like paint or varnish, safety equipment, and small hardware pieces like screws and tie-downs. This could add another $50 to $100 to your final cost.
So all up, you’re likely looking at a grand total somewhere in the range of $350 to $800. Of course, these are rough figures – your mileage may vary, and some folks might find themselves paying a tad more or less. But trust me, when you’re gliding smoothly over the water in a kayak of your own making, every penny is going to feel worth it!
How To Build Your Own Kayak Kit
Boy, isn’t there something empowering about creating something with your own two hands? Let’s dive into how you can build your own kayak kit.
- Kick start by choosing a design: Your kayak’s design is crucial to its purpose! If you want it for fishing, pick a fishing kayak design. If it’s for a peaceful paddle in the lake, a recreational kayak is your best bet. Your design will dictate the materials you’ll need.
- Preparation of materials: Gather all the required materials based on your desired design. Usual materials include marine grade plywood, epoxy, fiberglass, brass or stainless screws, and other marine grade construction materials. Don’t forget your safety gear!
- Cutting the plywood: Now comes the fun part. Carefully start cutting the plywood according to your design and measurement – precision is key here. Remember, this craft is supposed to float!
- Assemble the hull: Using the cut pieces, start assembling the hull. Glue the pieces together and allow it to dry. Make sure seams are strong to avoid leaks. After all, no one wants a sinking kayak.
- Fiberglass application: Apply fiberglass to the hull using epoxy. This strengthens your kayak and makes it water resistant. It’s a tedious process, but well worth the effort.
- Building the deck: Similar to the hull, follow your design to build the deck using cut plywood. Attach it to the hull using adhesive and let it dry.
- Final finishing: Sand your kayak to remove any rough surfaces. Apply a layer of marine varnish for a glossy, water-resistant finish.
- Installing outfitting: Finally, add your outfitting – this includes footrests, seats, and any other comfort features you desire.
- Sea trials: Once your kayak is complete, it’s time or the sea trials. Gently place your kayak in the water and get a fell for it – is it balanced? Stable enough? If not, you might need to make some adjustments.
- Personal touches: This is YOUR kayak. Feel free to add any personal touches, like paint or decals. You’ve built something great – don’t be afraid to show it off!
There you have it! With some persistence and elbow grease, you can craft your own seafaring vessel. Isn’t that something to be proud of?
How To Make A Small Kayak?
Alright, let’s dive into how you can craft your very own petite kayak. Now, I do have to remind you, this won’t be a walk in the park. You need patience and some dedication. Not to scare you off—it’s like any craft, once you get the hang of it, it’ll be a breeze!
First things first—you’re going to need some high-quality materials. We’re talking marine grade plywood, waterproof glue; the whole nine yards. Whichever type of kayak you’re planning on building, when it comes to materials… well, you certainly do get what you pay for!
Time to draw out your plans. Blueprints are essential when building your kayak. Knowing the details, measurements—an inch here, an inch there—it all adds up. It might seem daunting at first, but take it in stride.
Once you’re ready to start cutting, remember—measure twice, cut once! It’s an old saying, but it holds absolute truth. Sand down the rough edges, apply the waterproof glue, and place the cut-outs onto the frame. Easy-peasy, right? This is where the magic truly begins.
Now, I’m not going to sugarcoat it—the next part can be a bit tricky. Stitching the pieces together requires a steady hand. This is where your patience comes in handy. Once you’re done, voila! You have the skeleton of what will soon be your very own kayak.
Lastly, seal the deal. Get out the fibreglass and epoxy—time to make your kayak water-resistant. Let it cure…and there you have it! Your very own, self-built petite kayak ready to take on the water. What a feeling, eh?
Remember, practice makes perfect. Don’t worry if you run into some challenges along the way. Keep at it, and before you know it, you’ll be paddling away in your own hand-crafted kayak.
How To Build Your Own Kayak Step By Step
Oh boy, building your very own kayak! Let’s dive into the process together.
-
Start off by outlining the kayak’s design: Before we start sawing and hammering, it’s crucial to visualize the kayak first. Using a sketch paper or a digital tool, draw the general shape of the kayak you’d like to build. This will aid in choosing the right materials and understanding the exact dimensions needed.
-
Choose the right material : With the design in hand, it’s time to hunt for the perfect material. Wood, plastic, or even a combination of several materials can be used. Ensure it is strong yet lightweight, and capable of withstanding the elements.
-
Prep the materials: Here, we need to precisely cut and shape the materials according to the design. Measuring tapes, saws, or cutting tools are handy here. Remember, it’s always better to cut a tad oversized than too small, as you can always trim the excess later.
-
Assemble the frame: Next, we start piecing everything together. Use glue or screws to fasten the cut pieces together. It’s significant to ensure that the frame is steady and strong, as it is the skeleton of your kayak.
-
Install the deck and hull: Now that we have the frame ready, let’s add the skin! The deck (top) and hull (bottom) should be attached securely to the frame. At this stage, the kayak starts taking shape!
-
Waterproofing is crucial: Of course, we don’t want a sinking ship, do we? Therefore, make certain to seal all seams, cracks, and holes with waterproof adhesive or epoxy.
-
Polish and painting: Lastly, a good sanding and a couple coats of paint will not only make the kayak look beautiful, but also serve as an additional protective layer.
-
Remember the seats and storage compartments: Don’t forget about comfort and convenience. Adding a comfortable seat and storage compartments makes for a much enjoyable kayaking experience.
Building a kayak might seem like a daunting task, but it truly is a rewarding process. With every panel you cut and every screw you tighten, you’re one step closer to floating on water in your own hand-crafted vessel. Now those are some real bragging rights! Just remember to always prioritize safety in both building and using the kayak.
Final Verdict
Alright, let’s get down to the nitty-gritty on building your own kayak. It’s been one heck of a journey, hasn’t it? Whew! The process is, unquestionably, laborious and complex. However, the reward of navigating tranquil waters in a masterpiece of your own creation… ahh, that’s a feeling like no other, isn’t it?
The sense of achievement, the thrill of the journey, the connection with the elements – these emotions are just the tip of the iceberg when it comes to building your own kayak. Darn, it’s been a process filled with learning and character building. As they say, no pain, no gain!
The long hours spent meticulously shaping the deck, the countless measurements, the determination not to give up when your wildest constructions went awry… phew! Yet, the sense of accomplishment as we finally christen our creation – isn’t it exhilarating?
Ultimately, building your own kayak is a transformative experience. It’s not just about the physical artifact; rather, it’s a testament of your patience, creativity, and craftmanship. A true testament to your dedication, indeed.
Now, remember, perfection is not achieved in a day. Your first kayak might not be flawless, but that’s okay. It is, after all, a learning curve. So, don’t be too harsh on yourself, alright?
With each experience, your skills will refine, your precision will sharpen, and eventually, you’ll be producing kayaks that not only navigate smoothly but also turn heads with their beauty. Yeah, you heard me, beauty! After all, isn’t our kayak a reflection of our soul?
Building your own kayak, in my opinion, truly is an extraordinary journey. The journey of creating something from scratch, of overcoming obstacles, and finally, of realizing a dream… well, it’s simply remarkable.
So then, take a deep breath, embrace the journey, and start building your first kayak! Who knows? You might be nurturing a new hobby, a new passion, or even a new profession. Go for gold!
Frequently Asked Questions
Q1: How can I start building my own kayak?
Building your own kayak is an exciting DIY project, but it requires precise planning. Start with a thorough research into different styles of kayaks, and select a design that suits your skill level and kayaking needs. From there, find a detailed plan or diagram, gather the necessary tools and materials, and scout for a spacious, airy place to execute the project.
Q2: What materials do I need to build a kayak?
Building a kayak demands sturdy and durable materials. These may include marine plywood, epoxy, fiberglass, wooden strips, wire stitches, and varnish. Remember, the quality of materials significantly impacts the durability and efficiency of the kayak.
Q3: What tools are required for the kayak-building process?
Effective kayak building requires various tools like hand saws, power drills, clamps, wire cutters, sandpaper, mixing pots, paintbrushes, and safety gear (gloves and goggles). Remember, it’s not about having the most tools, but the right ones.
Q4: How much time does it take to build a kayak?
Well, it depends on your skill level and the complexity of your chosen kayak design. If you’re new to woodworking, it may take a couple of months. For more skilled crafters, it might take a few weeks. Patience is the key here!
Q5: Can I build a kayak if I don’t have any woodworking skills?
Absolutely! Everyone starts somewhere. While previous woodworking experience is helpful, it’s not a must. Many kayak blueprints come with step-by-step instructions. The important thing is to be patient, follow the instructions, and not rush the process.
Q6: What is the cost to build a kayak?
The cost can vary widely depending on the design and materials you choose. On average, you can expect to spend between $200 and $600. Always take into account that investing in quality materials will ensure durability.
Q7: Are DIY kayaks safe to use?
When built correctly, DIY kayaks are as safe as store-bought ones. However, for your safety, always test the kayak in shallow waters before venturing into deeper areas. Safety should always be your top priority.
Q8: Can I customize my homemade kayak?
Definitely! That’s the beauty of building your own kayak. You can customize every detail to suit your preferences, from the length and width to the color and add-on features. Just make sure your modifications do not compromise the kayak’s stability and safety.
Q9: What are the advantages of building my own kayak?
Building your own kayak is not only satisfying, but it also allows for customization that fits your needs. Additionally, it could prove to be a cost-effective alternative to buying a new one, especially if you already have the necessary tools.
Q10: What is the best type of kayak for a beginner to build?
For beginners, a stitch-and-glue kayak is a great place to start. This design is relatively simple and requires fewer tools and materials than other types. It’s also a fantastic way to learn and master basic woodworking skills.
Related Video